

Quickstart
From sign-up to your first query in a few minutes.
In a few minutes you will have a , a first , a in and the answer to your first query.
Before you start
All you need is an idea. Describe it to the AI in your project and start prompting.
Optional, whenever you want them:
- GitHub, to keep your code in your own repository.
- Your own data, such as a spreadsheet or CSV file.
- For developers: Python 3.11 or newer, and an API key from an owner or admin.
Developers need an admin
Only workspace owners and admins can create API keys. If you are a member, ask an admin for a key.
1. Sign up and set up your workspace
On first sign-in, Klarety walks you through a short welcome. Everything can be changed later in Settings.
Set up your profile
Add your name, an optional picture and a title. This is how teammates see you.
Name your workspace
Your projects, data and team live here. Use your company or team name; you can rename it any time.
Connect GitHub
Lets your projects push code and deploy on every push. Choose Skip to do it later from the Home page.
Stay in the loop
Optional links to follow Klarety's releases. Continue when you are ready.
Start your free trial
Start the free trial of Pro to unlock projects, Studios and your data. The page shows how many days it lasts. Cancel any time before it ends.
You land on Home. Its Get started checklist tracks the same steps: create your first project, connect GitHub, add your data, connect a tool and set up an agent.

2. Create your first project
A project holds your code, its and its deploys. You need one to build, run agents or deploy.
Start a new project
On Home select New project, or open ProjectsNew project.
Name it
Type a project name. The default Size is plenty. Leave How it runs on the standard shared machine: if it is taken back, a new one starts on its own and no work is lost.
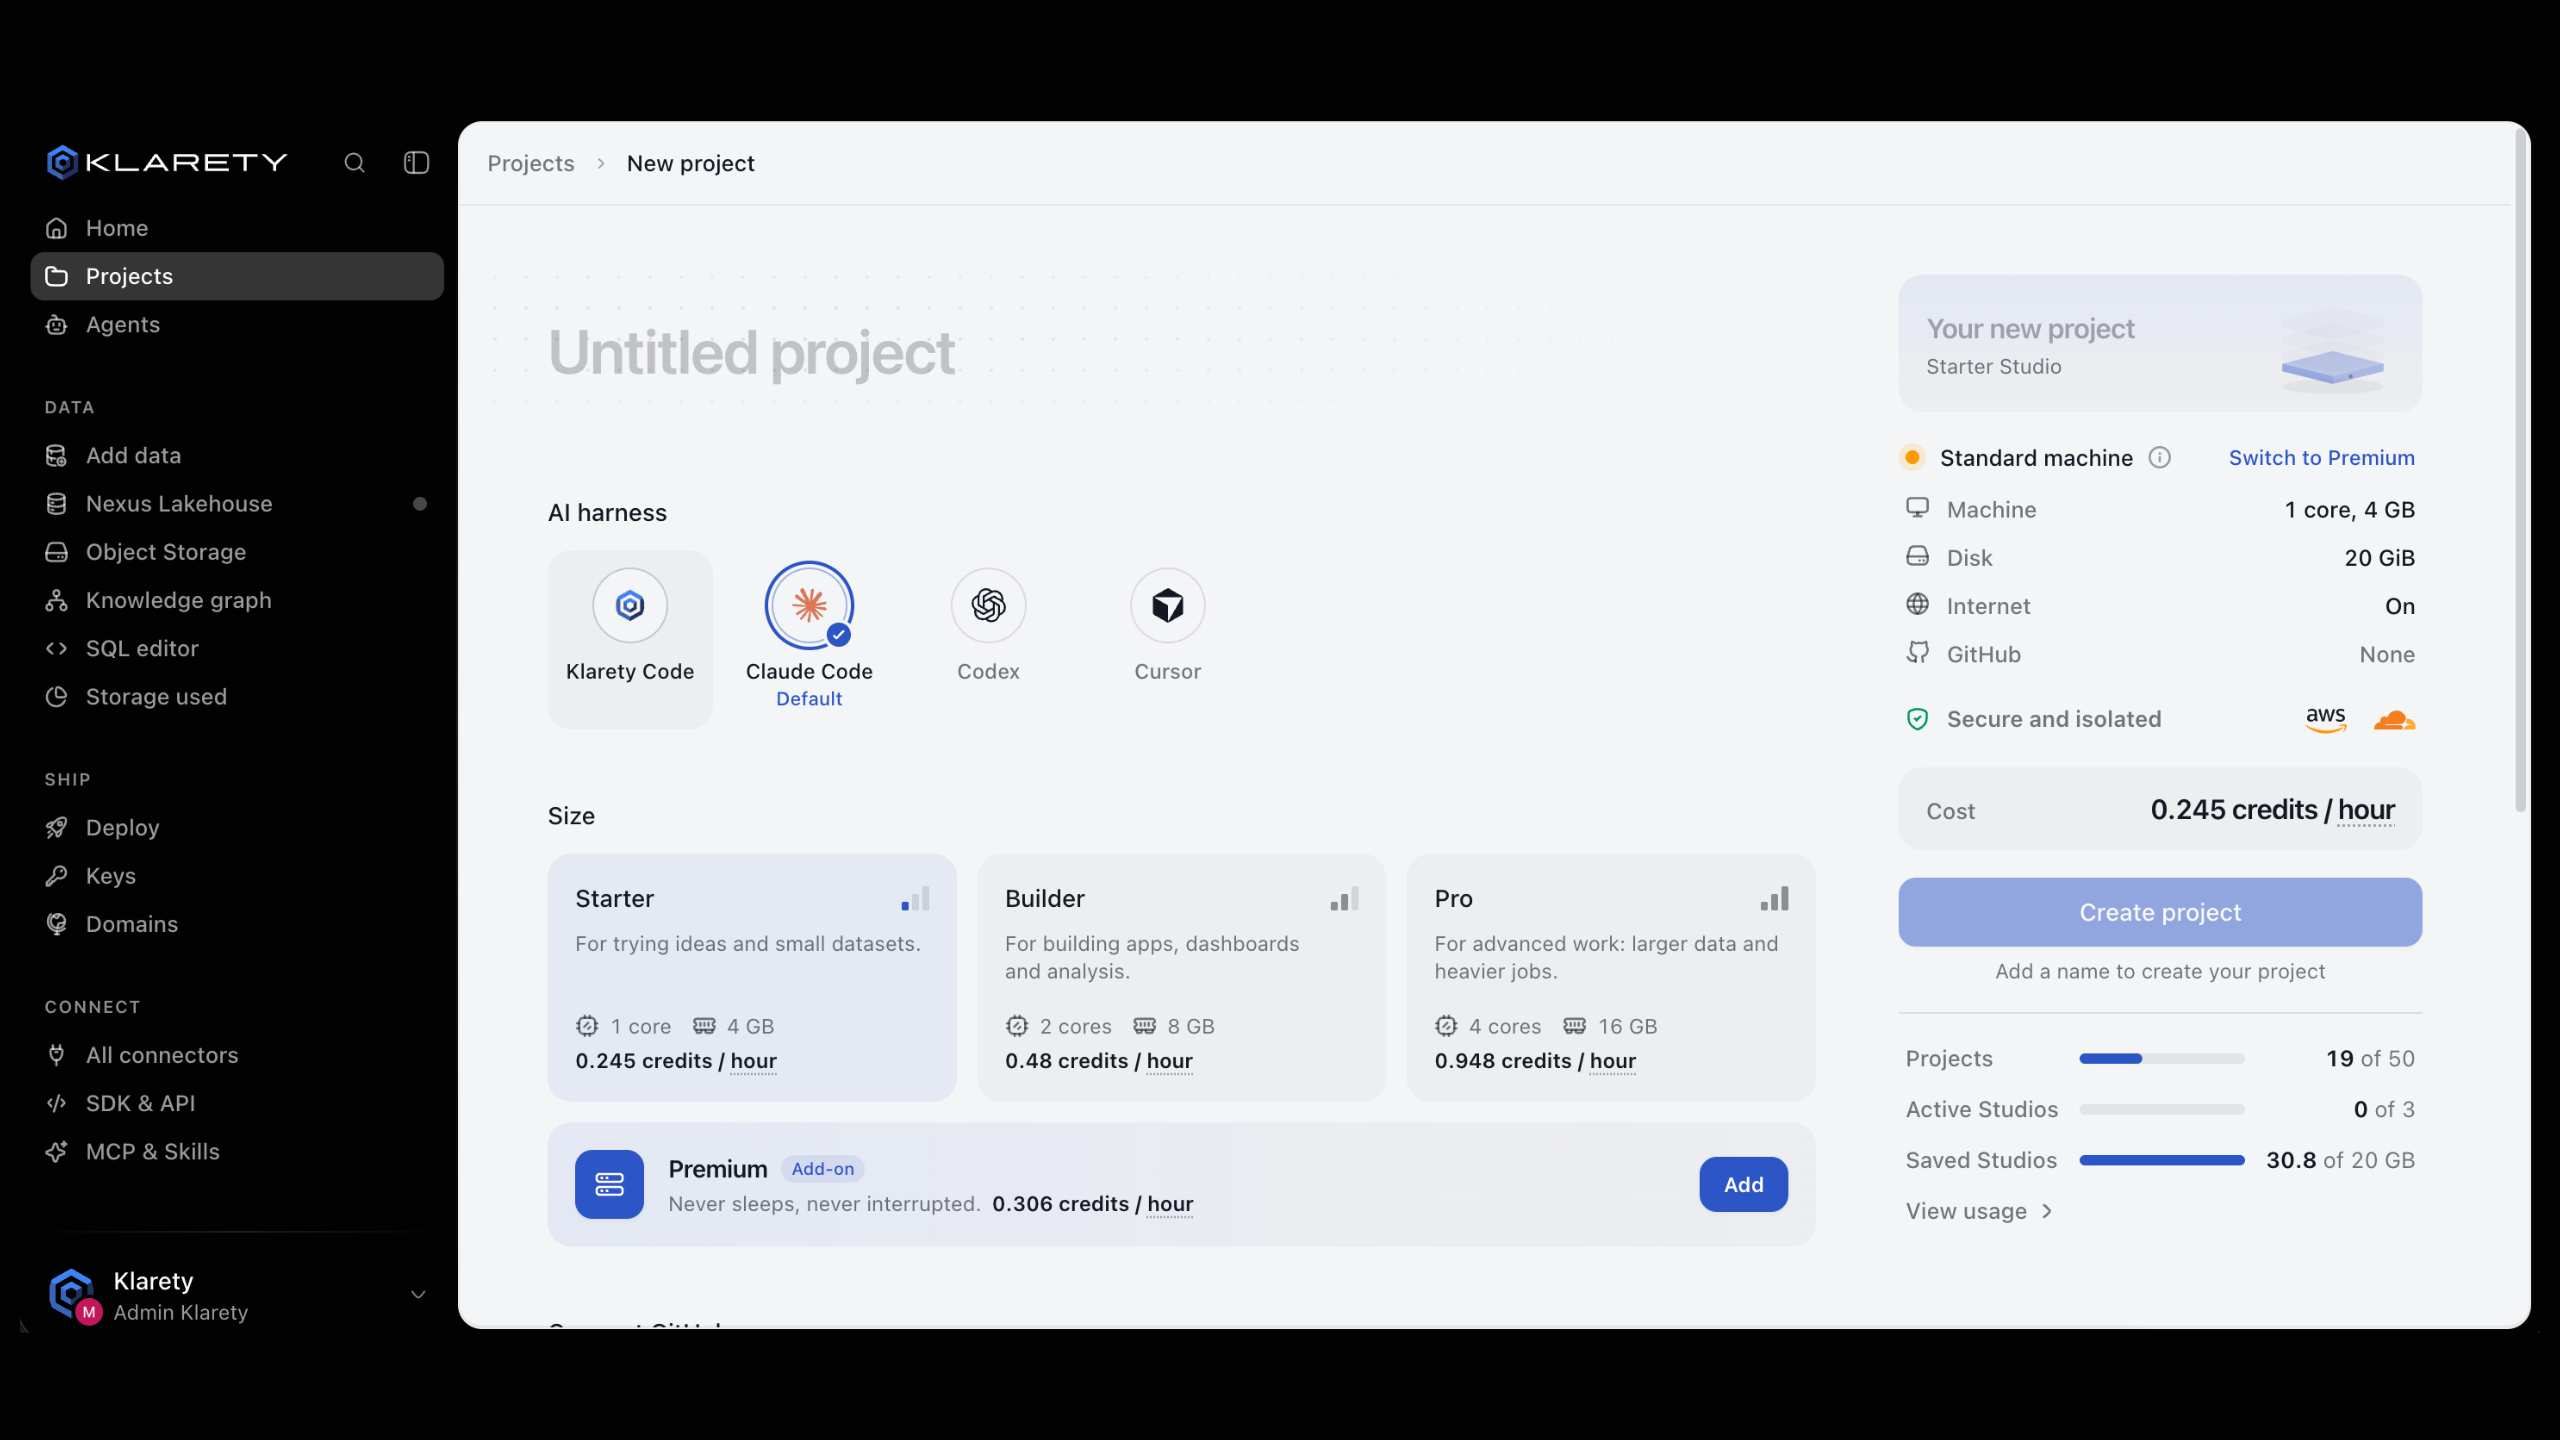
For every option, see Create a project.
Install the SDK and create an API key first (both in section 4 below), then:
from klarety import Nexus

nx = Nexus.connect()  # reads KLARETY_API_KEY
project = nx.projects.create("My first project")
print(project)
For every option, see Create a project.
3. Add your data
Klarety turns spreadsheets and CSV files into tables in Nexus, your database.
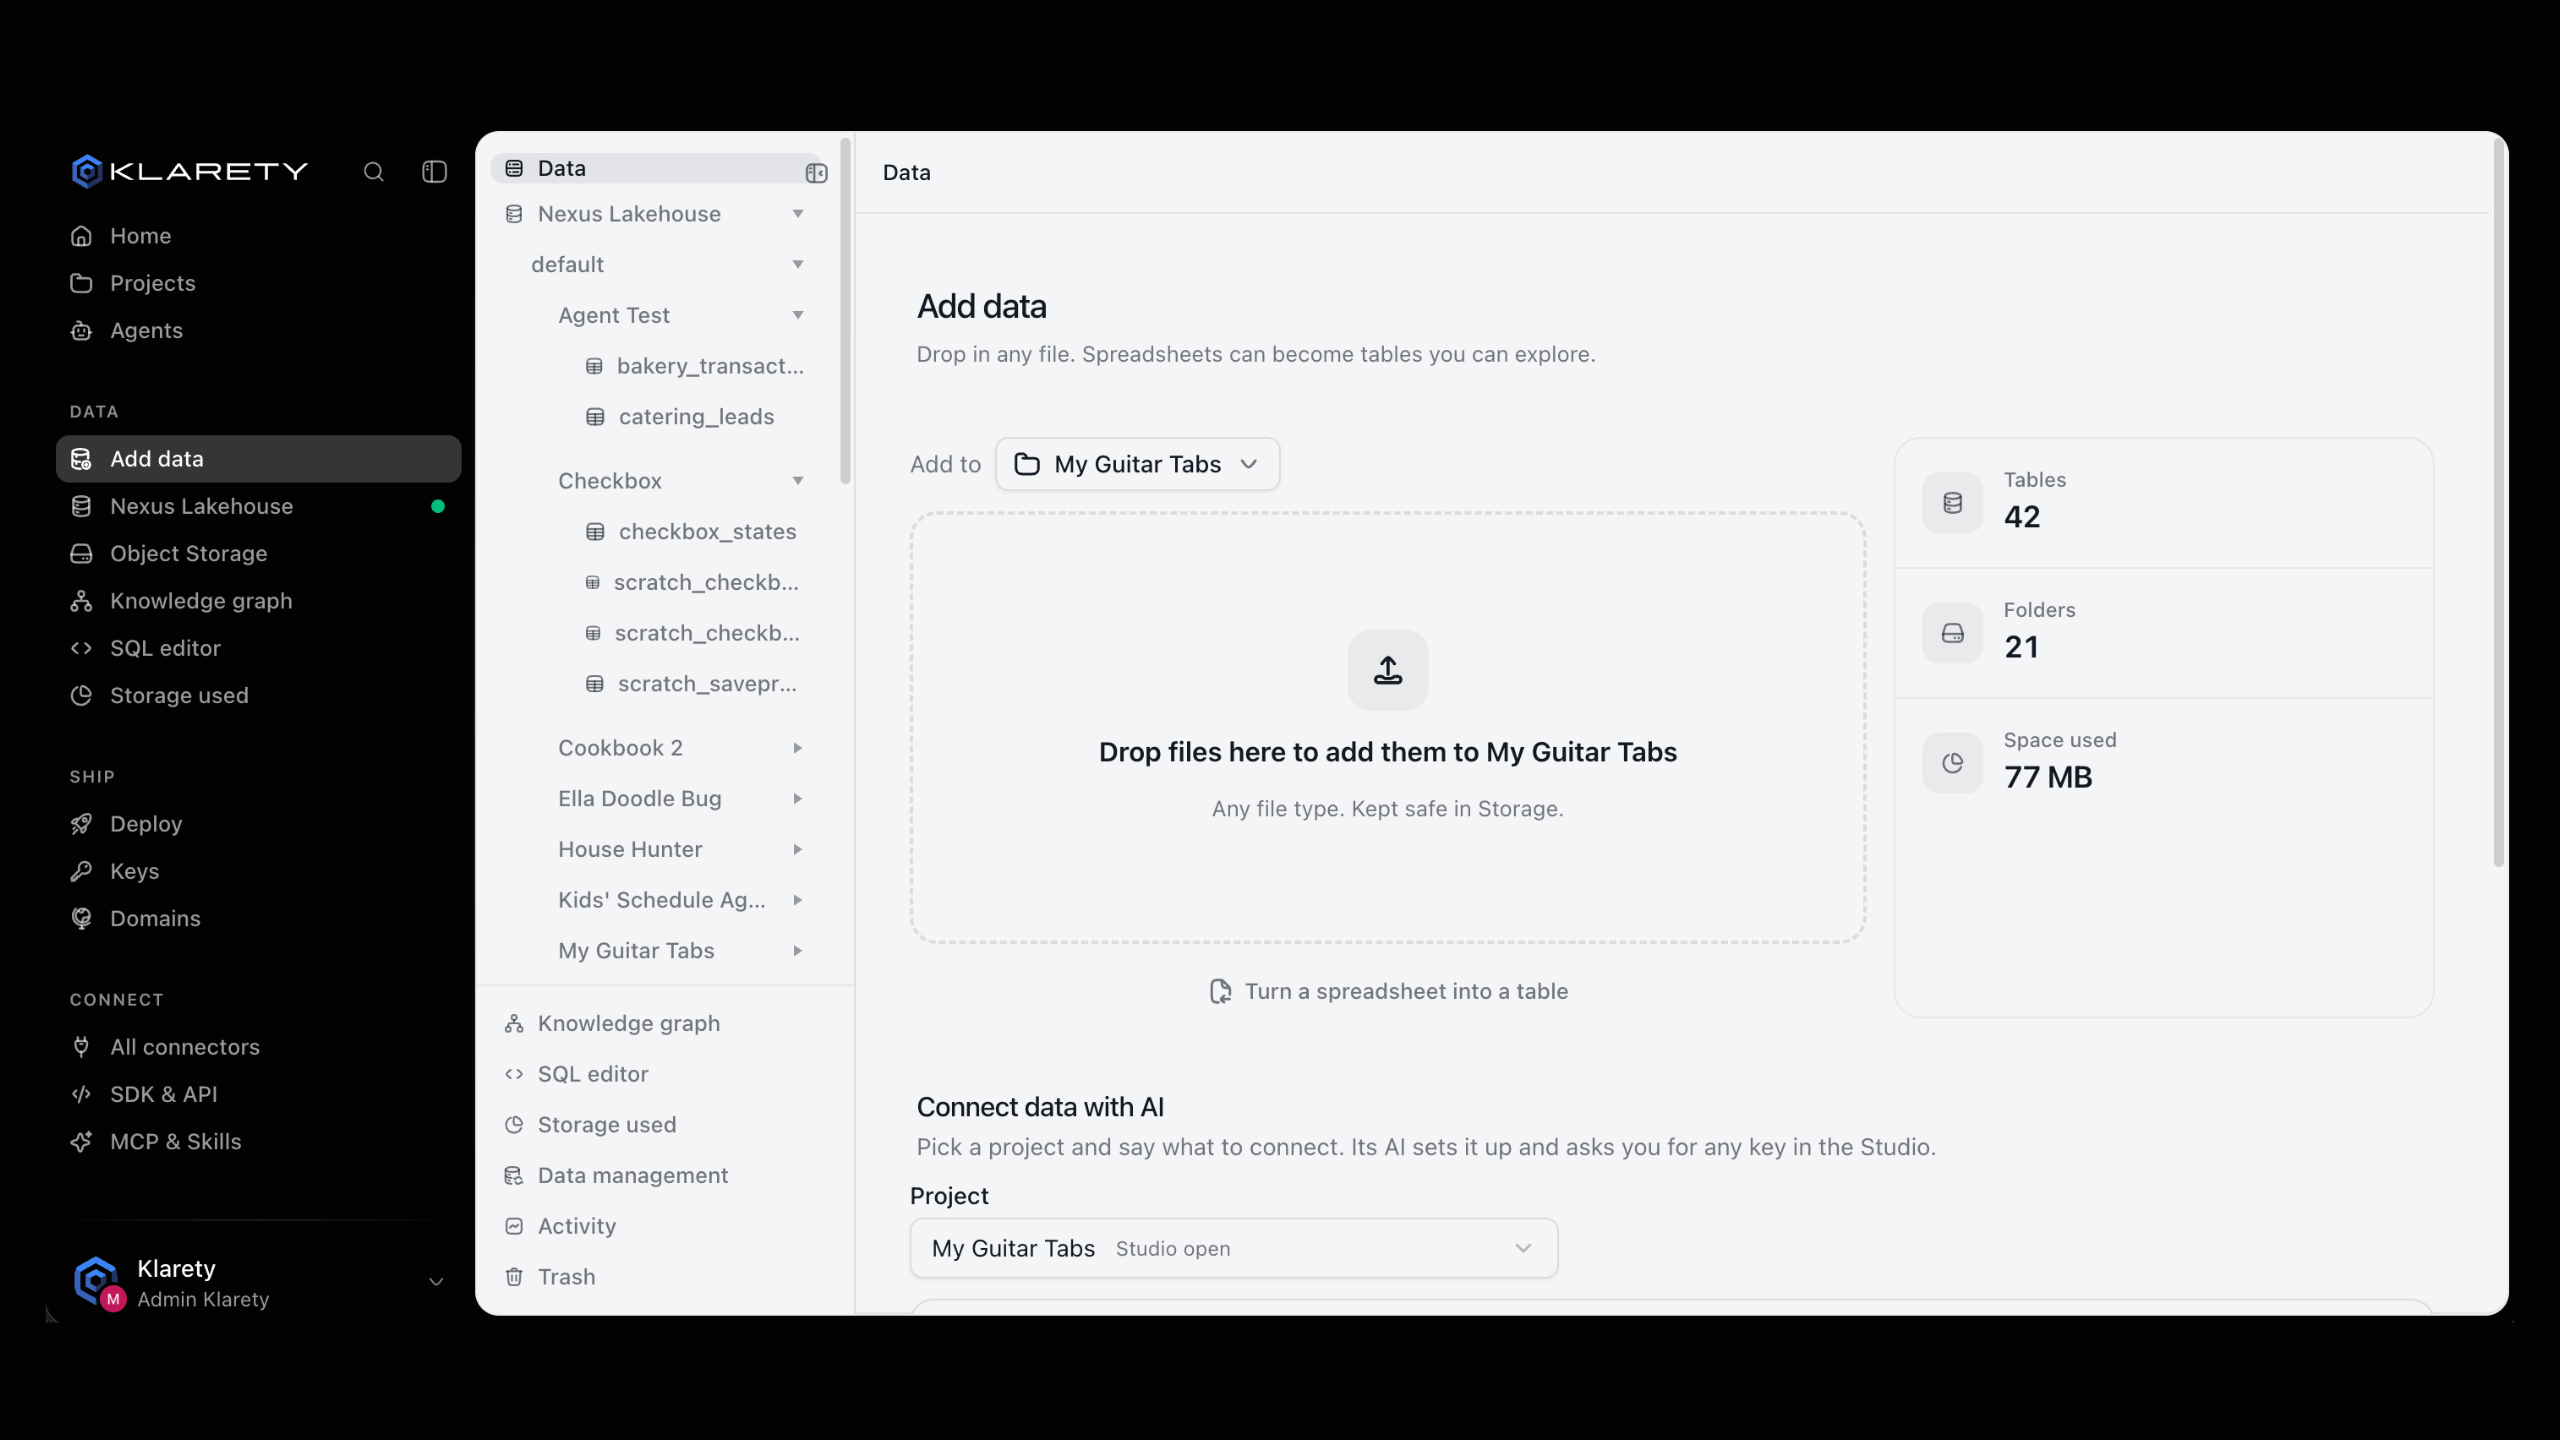
Open Add data
Go to Data and choose Turn a spreadsheet into a table.
Upload the file
Pick your file. Klarety shows the Columns found and suggests a Table name you can change.
Import
Select Import, then Open table to see your rows. The original file is also kept in a folder.
from klarety import Nexus

nx = Nexus.connect()
run = nx.ingest("orders.csv", into="orders")
print(run.run_id, run.state)
print(nx.ingest_status(run.run_id).state)
Loading runs in the background; ingest_status tells you when it has finished. See Ingest data for modes such as adding rows or updating rows by key.
4. Run your first query
Open the SQL editor
Go to DataSQL editor. The side panel lists your tables; click a name to insert it.
Run it
Select Run or press Cmd Enter (Ctrl Enter on Windows). Rows appear below the editor, with the row count.
Available on request
The Klarety SDK and CLI are available on request. To request access for your workspace, contact us.
Install the SDK
pip install klaretyCreate an API key
In the app, open SettingsSDK & API and select Create key. After verifying it is you, give the key a Name, choose its Access and when it Expires, then copy it. It is shown only once.
Connect and query
export KLARETY_API_KEY="your-key"from klarety import Nexus
nx = Nexus.connect()
print(nx.account().credits)
result = nx.sql("SELECT * FROM orders LIMIT 100")
for row in result.rows:
print(row)Nexus.connect exchanges the key once for a one-hour token and renews it for you.
Or use the command line
klarety login your-key
klarety sql "SELECT * FROM orders LIMIT 100"
klarety login stores the key in your operating system's keychain.
Check that it worked
- Your project appears in Projects.
- Your table appears in Nexus Lakehouse under Data.
- Your query returns rows. If not, check the table name in the SQL editor's side panel.
If something goes wrong
Next steps
- Core concepts: what each part of Klarety is.
- Your first project: open the Studio and make your first change.
- Ask your data a question: go further with SQL.
- Build your first agent: let Klarety do recurring work for you.