

Add data
Upload files, turn a spreadsheet into a table, and choose how new rows land in a table that already exists.
Bring data into three ways: upload files to a folder, turn a spreadsheet into a , or use a for a source such as PostgreSQL or Google Sheets. This page covers the first two, and adding rows later.
Before you start
- Access to add files to the folder. Owners and admins can add anywhere.
- To add rows to a table, access to change its data. A limited member needs it from an admin. See Data access.
- Each file has a size limit set by your plan, shown in the upload dialog.
Files that can become a table
Any file can be uploaded and kept. These can also become a table without any code:
- CSV, TSV and plain text with a separator (
.csv,.tsv,.txt) - JSON and JSON Lines (
.json,.jsonl,.ndjson), and XML - Excel workbooks (
.xlsx) - Parquet, ORC and Avro
- Map data: GeoJSON, GeoParquet, GeoPackage, Shapefile (as a
.zip), KML, KMZ, GPX and FlatGeobuf
Upload files
Open Add data
Go to Data and find Add data.
Drop your files
Drop files on the box, or click it to choose them.
Choose a folder
Under Add to, pick one of your folders, browse all folders, or make a New folder.
Upload
Select Upload. When the dialog says Uploaded, select Open folder to see the files.
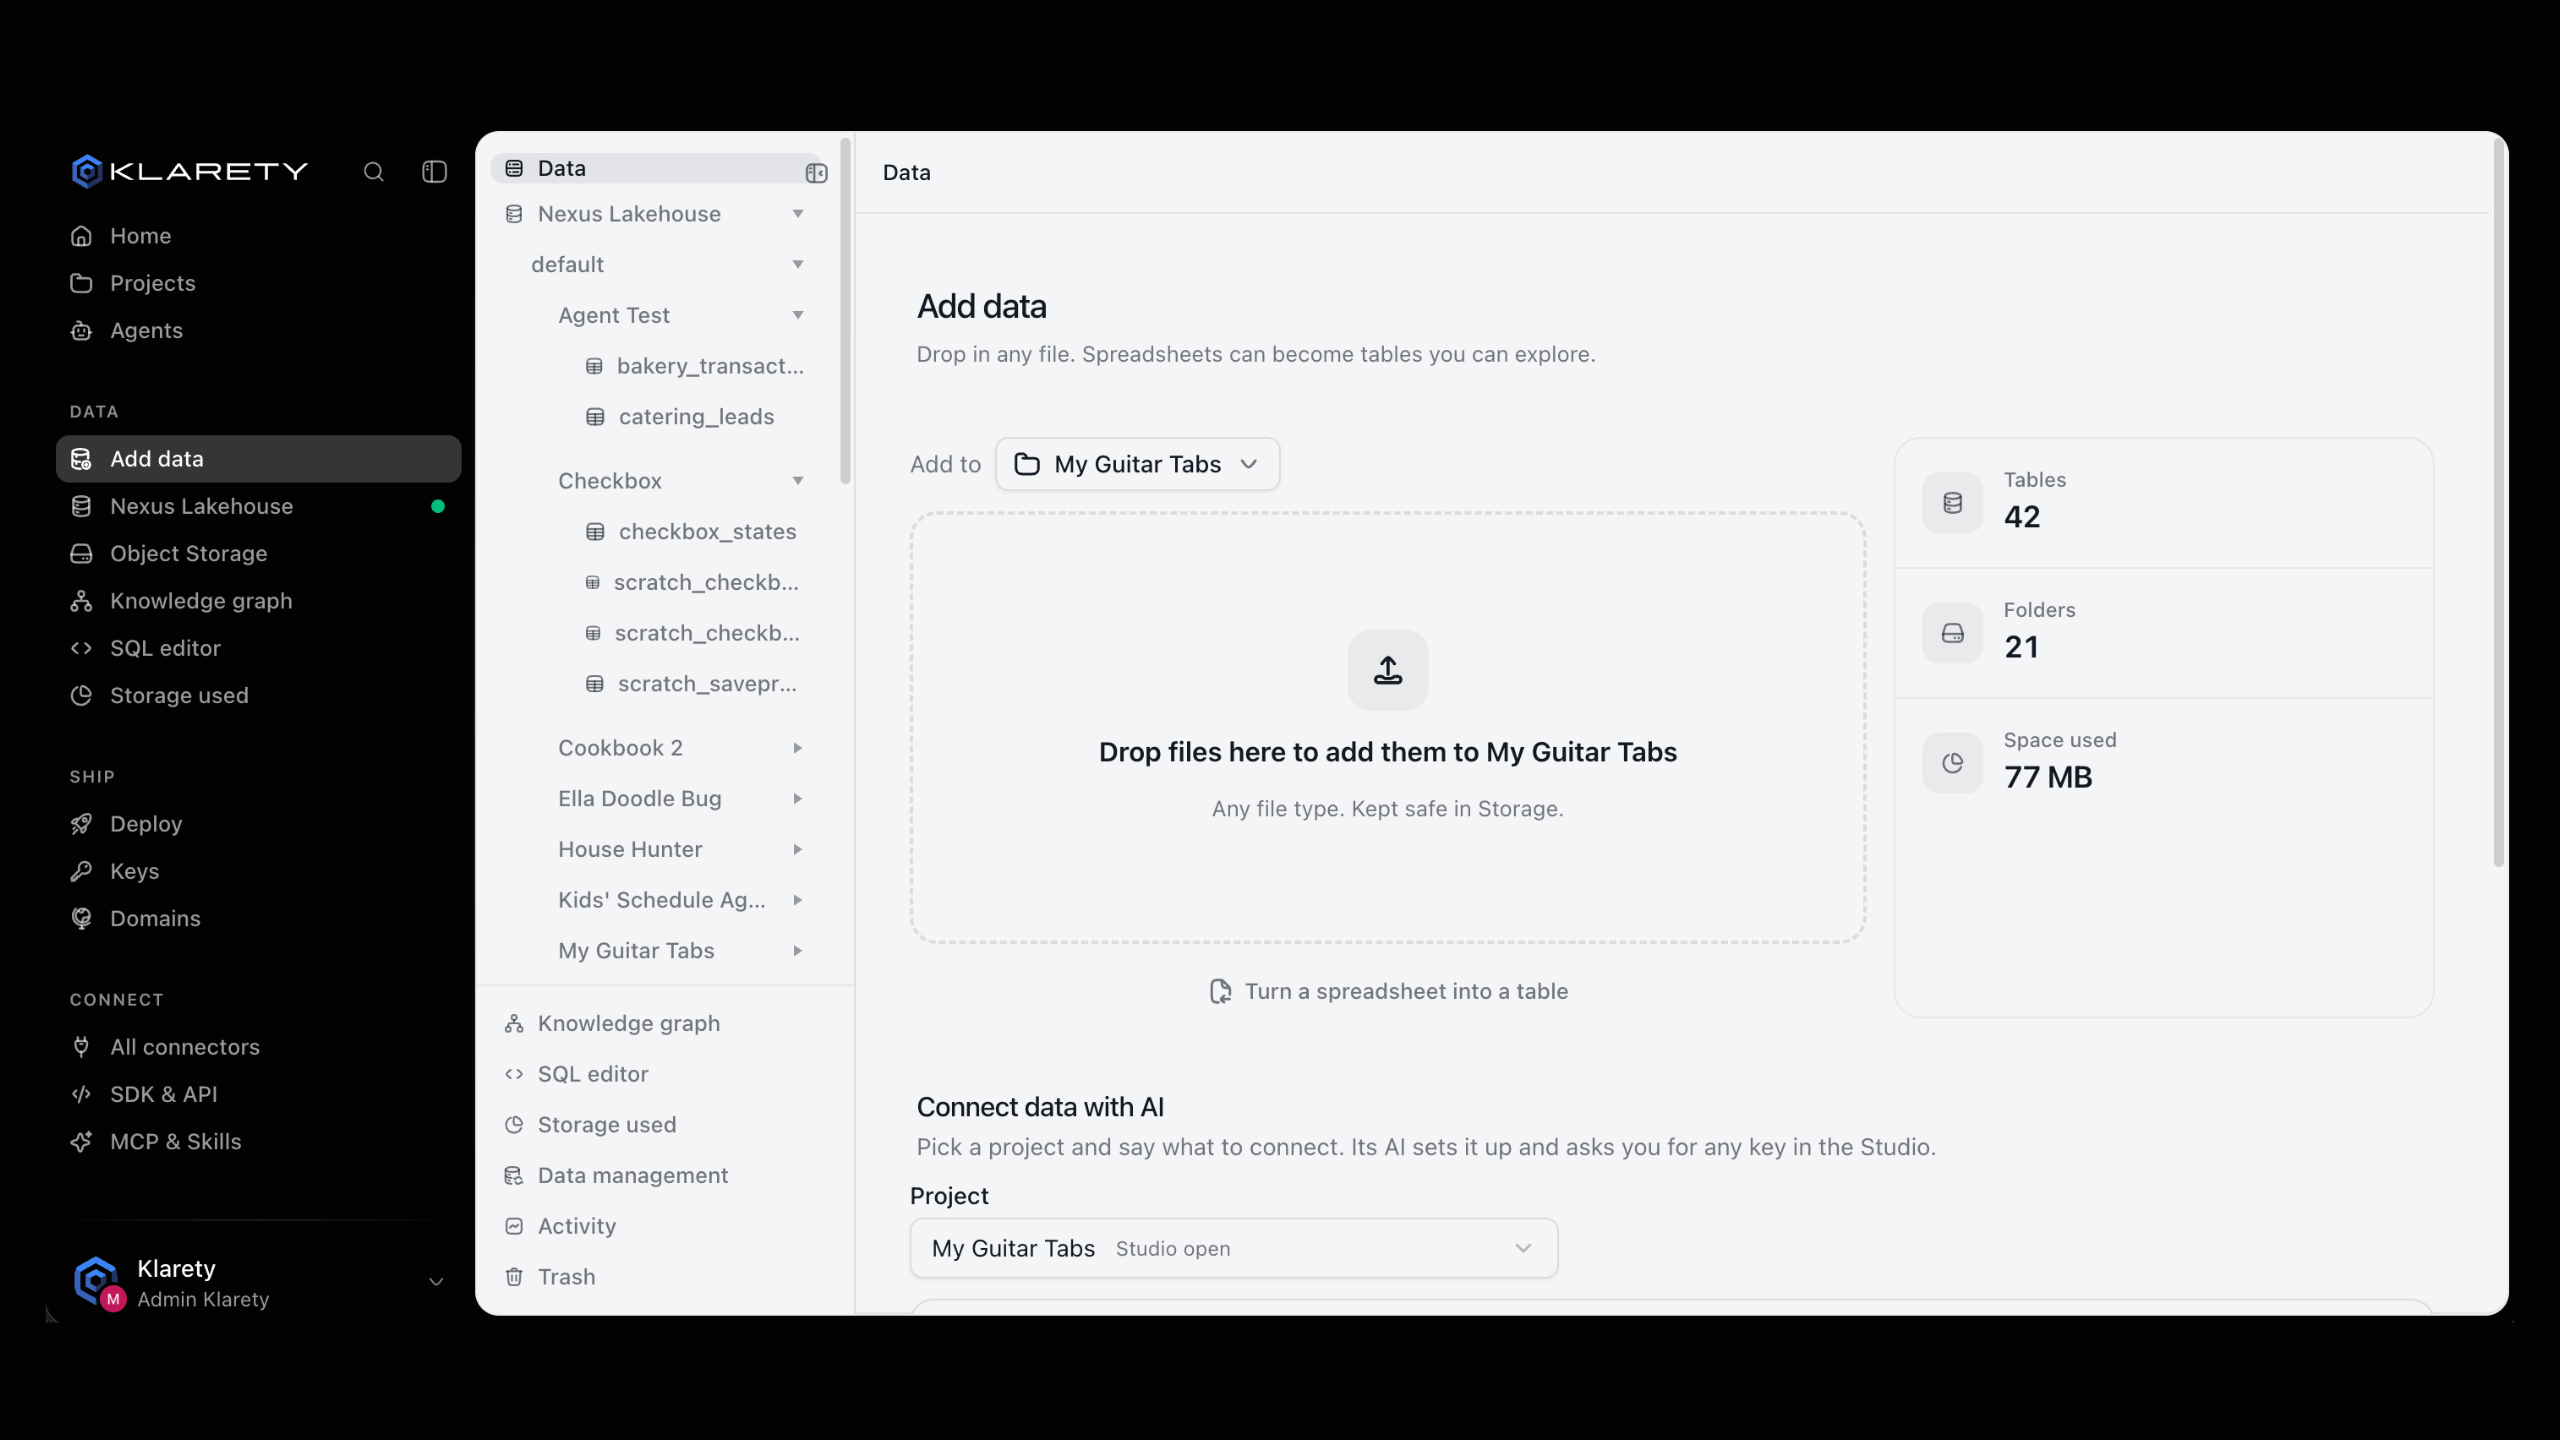
A file with the same name is saved as a new version; the earlier one is kept. If an upload stops part way, upload the same file to the same folder again: only what is missing is sent.
from klarety import Nexus

with Nexus.connect() as nx:
    folder = nx.folders.at("reports/2026")
    saved = folder.upload("q3-revenue.xlsx")
    print(saved["version"])
folders.at() walks a path such as reports/2026 from the folders you can reach. upload() waits until the version is recorded; pass wait=False to return once the file is accepted, which suits many uploads in a row. The command line equivalent is klarety put q3-revenue.xlsx reports/2026.
Turn a spreadsheet into a table
Start the import
In Data, select Turn a spreadsheet into a table. You can also open Nexus Lakehouse and select Import a table.
Pick the file and where to keep it
Choose the file. Under Keep the file in, choose a folder; the file is kept there for reloading or download.
Check the columns
Check the names and types under Columns found.
Name the table
Enter a Table name. If the name is taken, you see This table already exists and choose Add rows or Replace rows.
Import
Select Import. When it finishes, select Open table.
A file already in Object Storage becomes a table the same way: open its menu and choose Make a table.
Preview first, so a wrong column guess is caught before any row is written. Then load:
import time

from klarety import Nexus

with Nexus.connect() as nx:
    preview = nx.ingest_preview("customers.csv", into="customers")
    print(preview)

    run = nx.ingest("customers.csv", into="customers", schema="default")
    while run.state in ("accepted", "running"):
        time.sleep(2)
        run = nx.ingest_status(run.run_id)
    print(run.state)
A run ends as succeeded, failed or cancelled. ingest() takes a local path, which it uploads first, or a URI. From the command line: klarety ingest customers.csv --into customers.
Add rows to a table that already exists
When a table already exists, choose how the new rows land:
| Option in the app | mode in code | What happens |
|---|---|---|
| Add rows | auto | New rows are added. Rows already in the table are not added twice. |
| Update rows by key | upsert | You choose the columns that identify a row. A row whose key matches is replaced; the rest are added. |
| Replace all rows | replace | The table holds only this file afterwards. History keeps the old rows. |
Replace all rows
The table keeps only the new file. The old rows stay in history, so you can go back if the file was wrong.
Add rows suits new records, such as this month's orders. Update rows by key suits corrected records, such as a fresh customer export keyed by customer_id. Replace all rows suits a file that is the full, current truth.
Open the table
In Nexus Lakehouse, open the table and select Add data from a file.
Choose the file
Pick the file and the folder to keep it in.
Choose how the rows land
Under How the rows land, choose Add rows, Update rows by key or Replace all rows. For Update rows by key, tick the Columns that identify a row.
Load
Select Load. You can close the dialog; the load keeps going, and the History tab shows the new version when done.
from klarety import Nexus

with Nexus.connect() as nx:
    run = nx.ingest(
        "customers-latest.csv",
        into="customers",
        mode="upsert",
        key=["customer_id"],
    )
    print(run.run_id, run.state)
A key has at most 8 columns. One file loads into one table once: loading the same file again does nothing unless you pass force=True.
To load rows from a connected source, name the connection and a query: nx.ingest(connection="CONNECTION_ID", query="SELECT * FROM orders", into="orders").
Rows that fail a data check
Rows that break a table's data check are set aside; the rest load as normal. The check panel shows how many rows each load wrote and set aside. See Work with tables.
What can go wrong
Where to go next
- Work with tables: browse, edit and check the table you just made.
- Object storage: import new files from a folder automatically.
- Connectors: bring data in from PostgreSQL, Google Sheets, Amazon S3 and more.
- Query with SQL: ask questions of your new table.