

Deploy your first app
Put a project's app online at its own address, then add your own domain.
In your project open Deploy. If it is not set up yet, ask the AI to set it up. Choose a free address, select Deploy, and open it when live. Roll back returns to any earlier deploy; Add domain adds your own name.
What you will build
A live app at its own free address, built from your 's code. You will it, check it, and learn to roll back, take it offline and add a domain.
Before you start
- A project with an app in it. See Your first project.
- : a live app is paid for with credits while it runs.
- Optional: the project linked to a GitHub repository, so each push ships a new build.
Deploying needs Pro
The free trial builds and runs everything in ; deploying apps comes with Pro. See Billing.
Steps

Set the project up to deploy
If you see This project is not set up to deploy yet, describe what the app should run and select Set this project up to deploy. The AI reads your repository and sets up each part the cheapest way. Each part then shows in the deploy settings.
Choose how it runs
For each part, pick a run setting:
- Sleeps when idle: starts on a visit and costs nothing while idle. The first visit after a quiet spell takes a few seconds.
- Always on, lower price: keeps running at a lower price, and may restart now and then.
- Always on: keeps running and is never interrupted.
Each shows the most it can cost per hour at full load. See Run settings.
Choose your app's free address
Under Your app's free address, choose a name of 3 to 30 lowercase letters, digits and single dashes. It is free and keeps working after you add your own domain.
Deploy
Select Deploy. It builds from the latest commit and shows each step until live.
From a terminal in the project, or anywhere with your API key set:
klarety deploy --project <project-id>It deploys the linked GitHub branch, or the current commit if none is linked, and prints the deploy_id. Inside a Studio, --project is not needed. From Python:
from klarety import Nexus

nx = Nexus.connect()
deploy_id = nx.projects.deploy("<project-id>")
If the deploy was asked for by an AI, it waits for a person: select Approve and deploy, or Reject. See Approvals.
Open your app
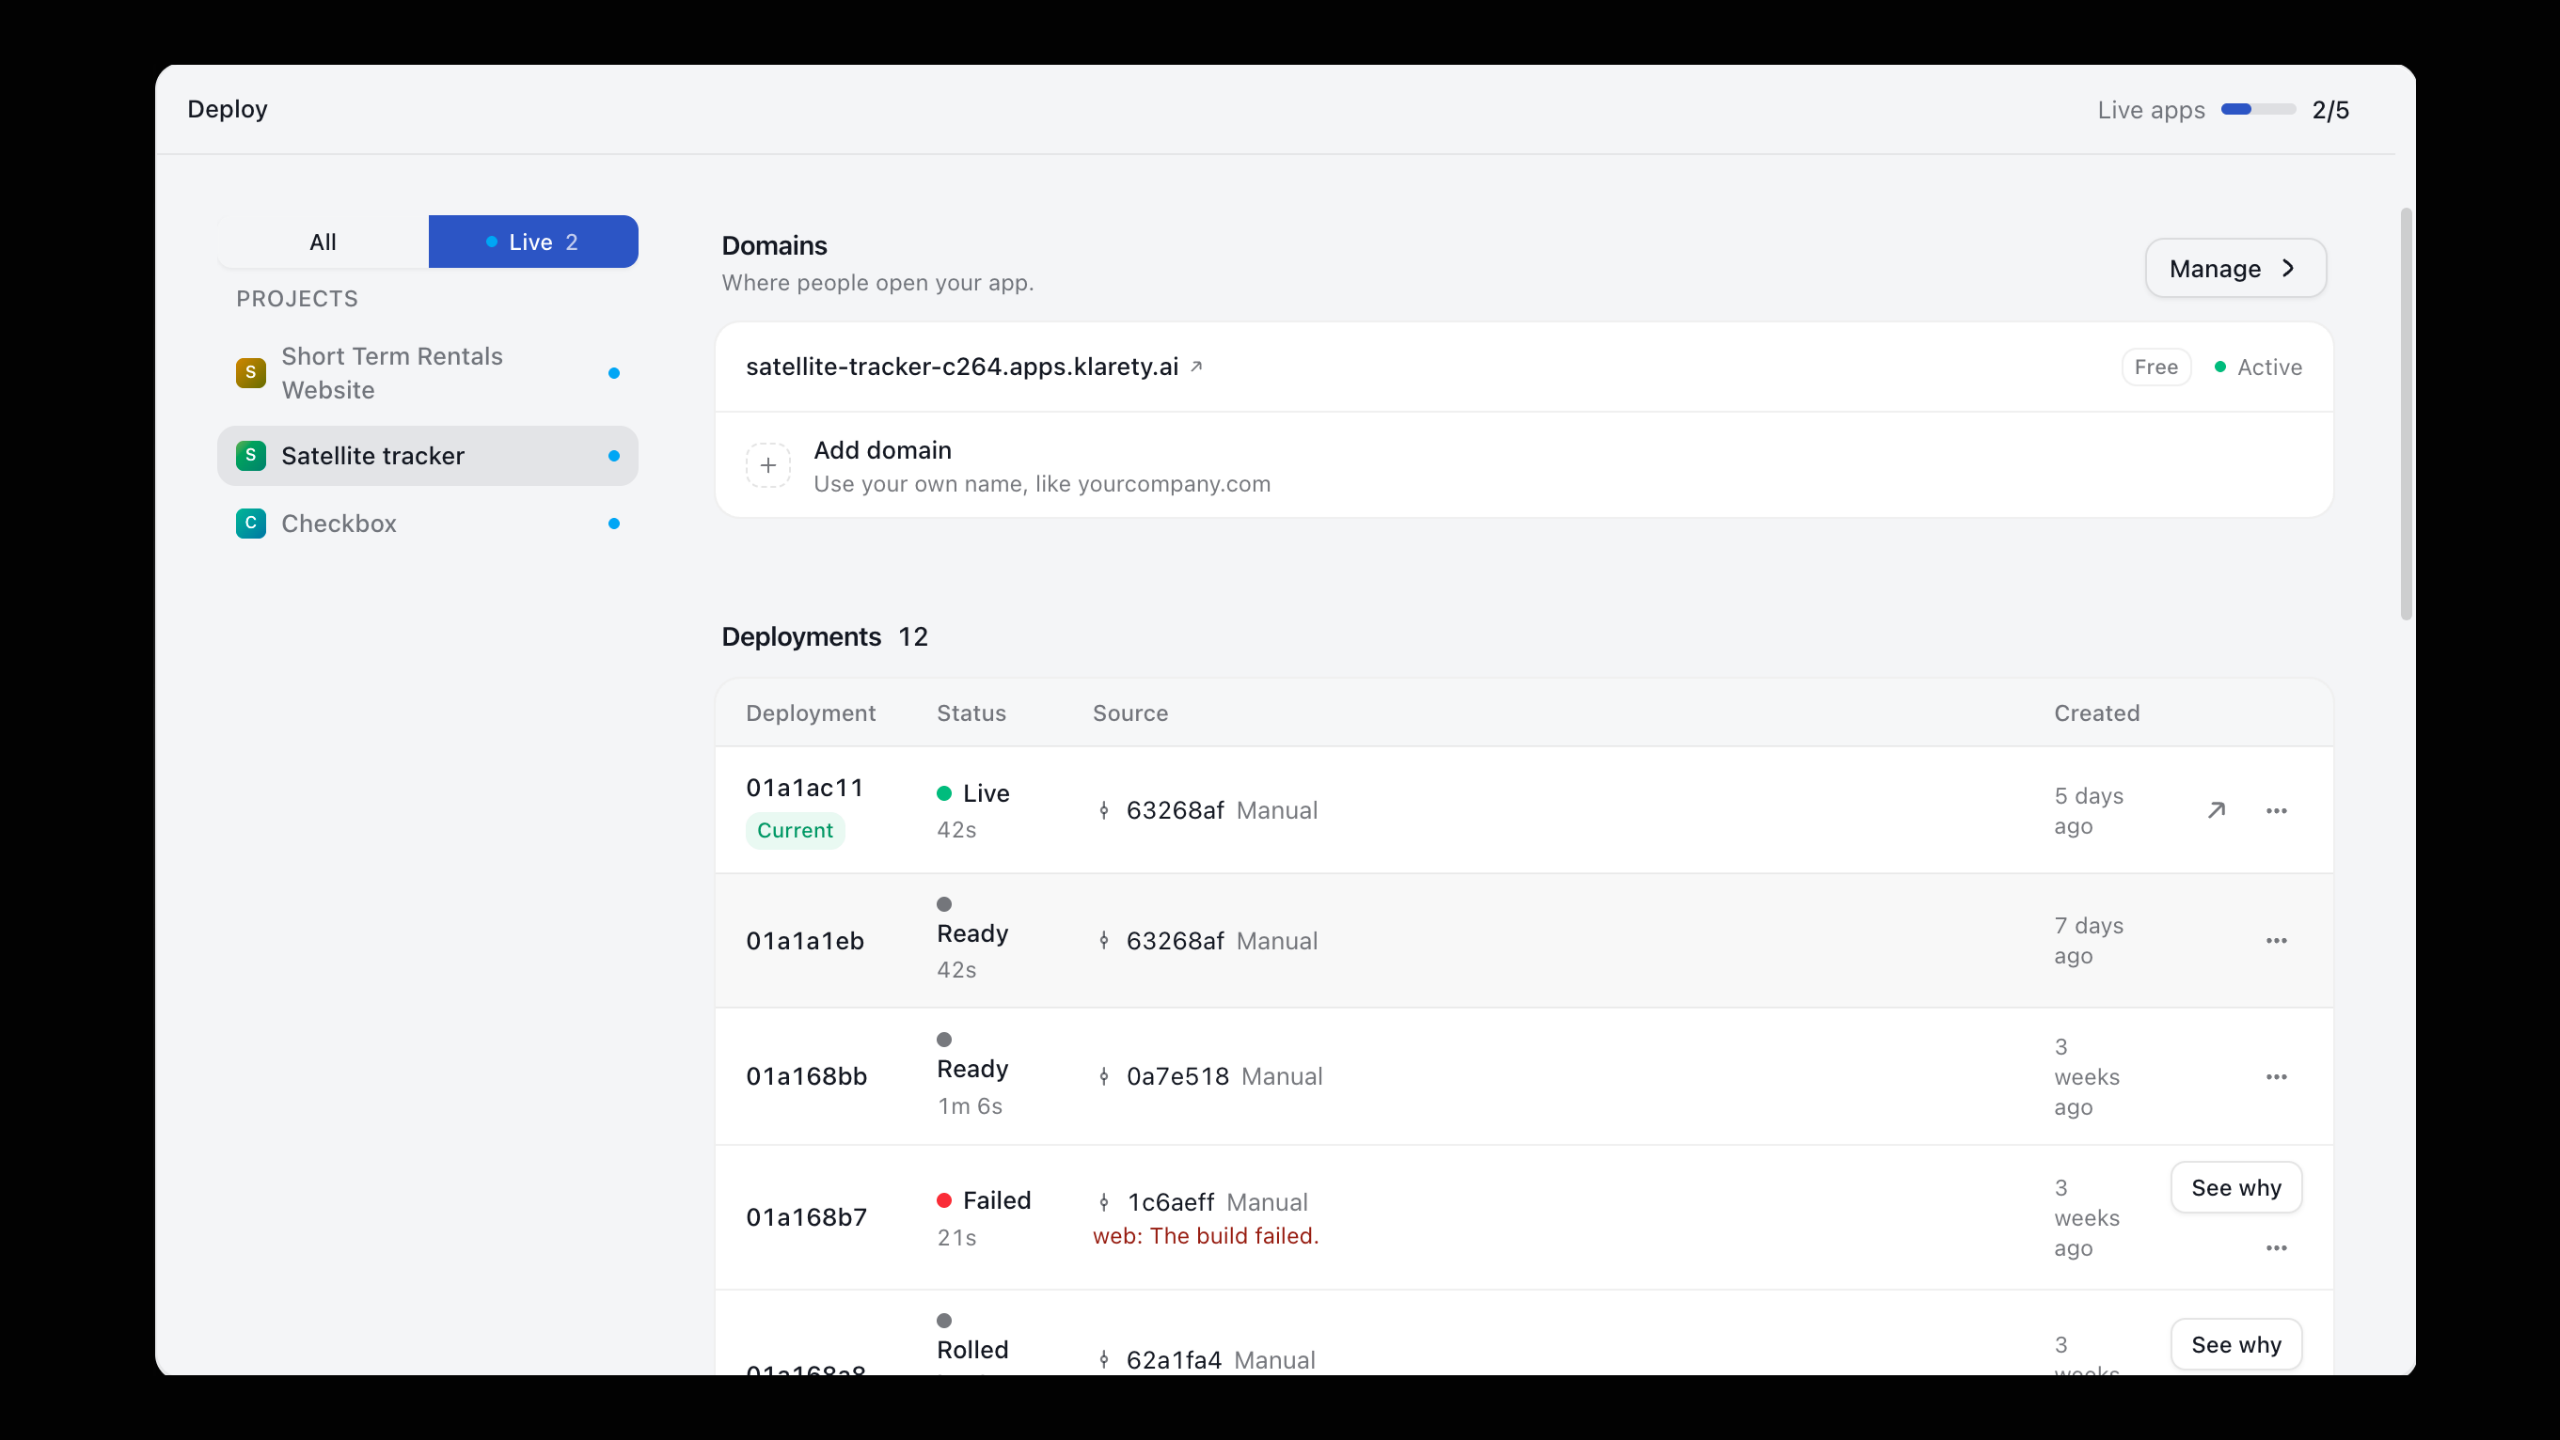
When the deploy is live, the project overview shows Live at your address. Open it.
Check that it worked
- Your address answers in the browser.
- The deploy list shows the deploy as live, with how long it took.
- The project's Activity shows the live deploy.
Common variations
- Redeploy. Redeploy builds the latest version and replaces the live app once ready.
- Roll back. Choose Roll back to this deploy on any earlier deploy. Nothing is rebuilt, and you can switch back the same way.
- Take it offline. Take offline stops the app at once, so it costs nothing. Name, data and deploys stay; roll back or deploy to bring it back.
- Use your own domain. Select Add domain and choose Buy a new domain (paid with credits, set up for you), Connect an external domain (free, add two DNS records where you manage it), or Use a connected domain. See Domains.
Buying a domain costs credits
A bought domain is charged in credits right away for one year, and renews every year while renewal is on.
If something goes wrong
A failed deploy shows what went wrong in plain words, with what your app printed. Fix with AI has the Studio's AI find and fix the cause.
Next steps
- Deploy an app: every deploy option.
- Domains: buy or connect your own domain.
- Run settings: cost and speed for each part of your app.
- Logs: see what your live app prints.